
Once you coaching business starts to gain some traction you might find scheduling appointments with your clients becomes increasingly difficult. Each of them has ever changing schedules as do you who is now juggling all aspects of your business (clients, marketing, bookkeeping, etc.) along with your personal life. If only you could afford an assistant to handle all of that for you…
Luckily there is web app that will eliminate most, but not all, of the scheduling pain. Calendly works by allowing you to send a web link to your clients so that they can see when you have appointments available and then schedule one that works for them. Calendly also connects to your calendar to make sure that you are never double-booked. A few of the other features that I love are automatic reminders (either via email or text), custom questions you can use to gather information upfront, a minimum scheduling option that allows you to make sure nobody is scheduling last minute appointments, and a billing feature that allows you to collect payment for your coaching services.
Best of all–Calendly is super easy to use. I’m going to walk you through creating an event which is a process that will take you just a couple of minutes.
1. Start by creating a free account on Calendly.
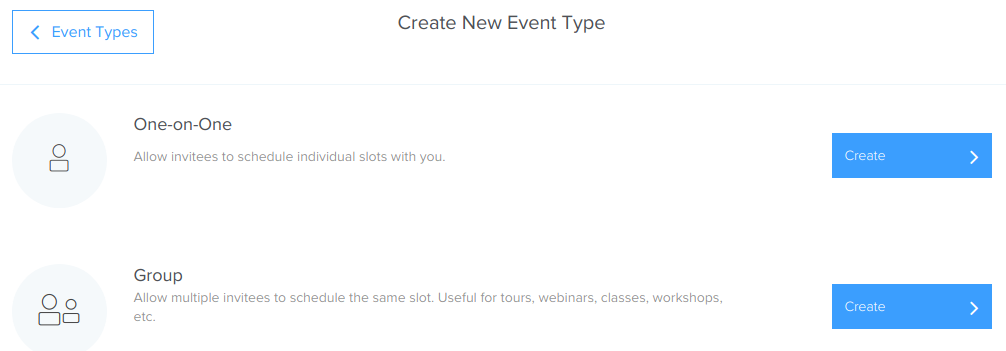
2. Next click on “Event Types” in the menu at the top of the page. Then click on “New Event Type”
3. For your one-on-one coaching sessions you’re going to want to use the “One-on-One” event type. There is also a “Group” event type you can use if you run workshops or webinars (look for a future article on those) that allows multiple people to sign up for the same event.
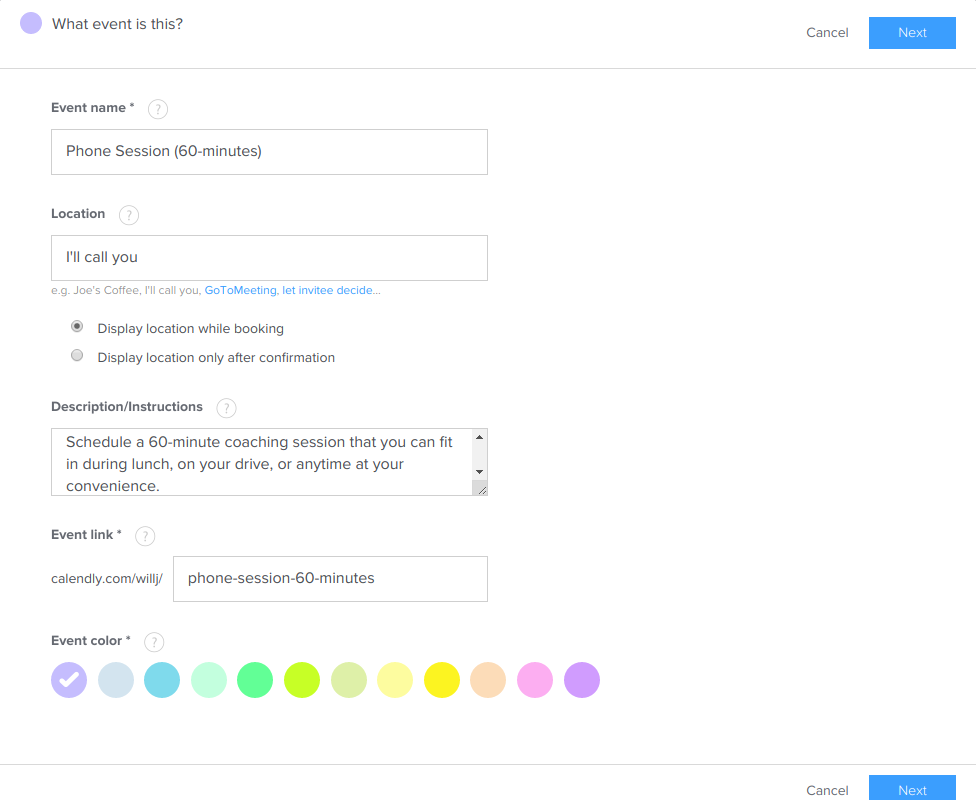
4. Now you’ll fill in the details for your event. For this example I’m going to offer 60-minute coaching sessions via the phone. I’m going to type in the name of event (Phone Session), the location (I’ll call you), and a description of the event.
5. On the next screen I’ll start by changing the duration of the event to 60-minutes.
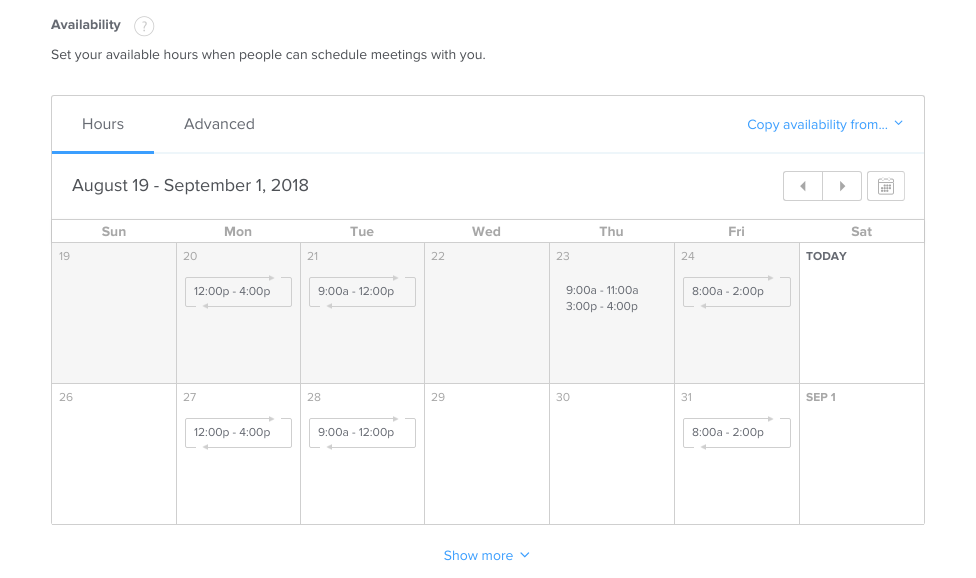
Now comes the critical time of setting the time slots. You’ll see that it default to allowing your clients to schedule with you from 9 am to 5 pm every weekday.
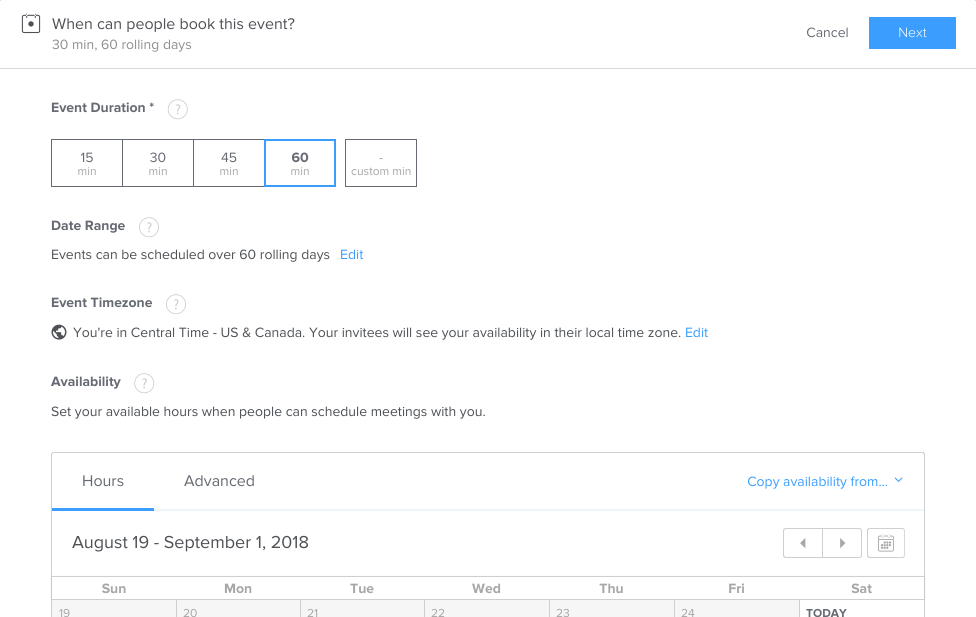
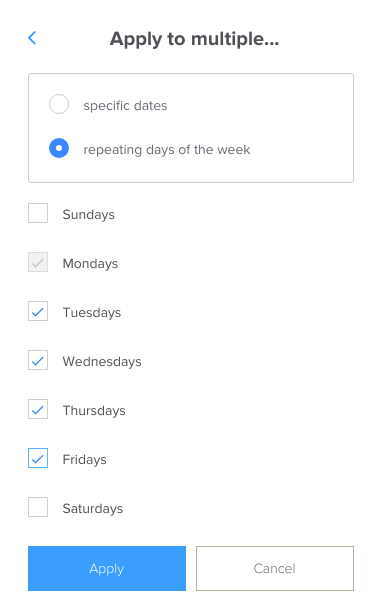
6. I want to start with a clean slate so I’m going to delete all existing availability windows. I’m going to click on the first time-slot (9 am to 5 pm on Monday). A window will pop-up that might be a bit confusing at first.
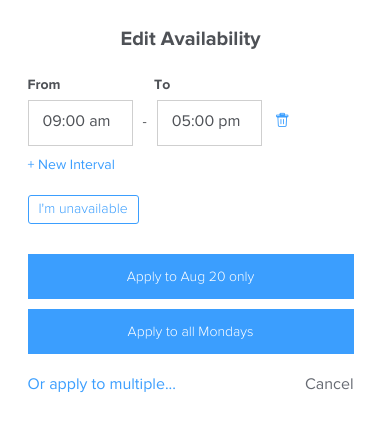
We’ll get into it a bit more later but right now we want to click on the trash can next to the time slot followed by “Or apply to multiple” at the bottom of the window. Click on the checkboxes for each day of the week and then hit apply.
7. We now have an clean slate to create the time slots we want to offer our clients. I’m going to click on Monday. This brings up a new window. I’m going to add a time windows by clicking on “New Interval”. I’ve got busy mornings on Monday so I’m just going to offer afternoon calls. You’ll see that you can apply these changes to just that particular day or to all Mondays. I’m going to click on “Apply to All Mondays”.
8. Repeat for any other days you are offering appointments. You can schedule on a daily basis or recurring weekly. You can also add multiple intervals to a single day.
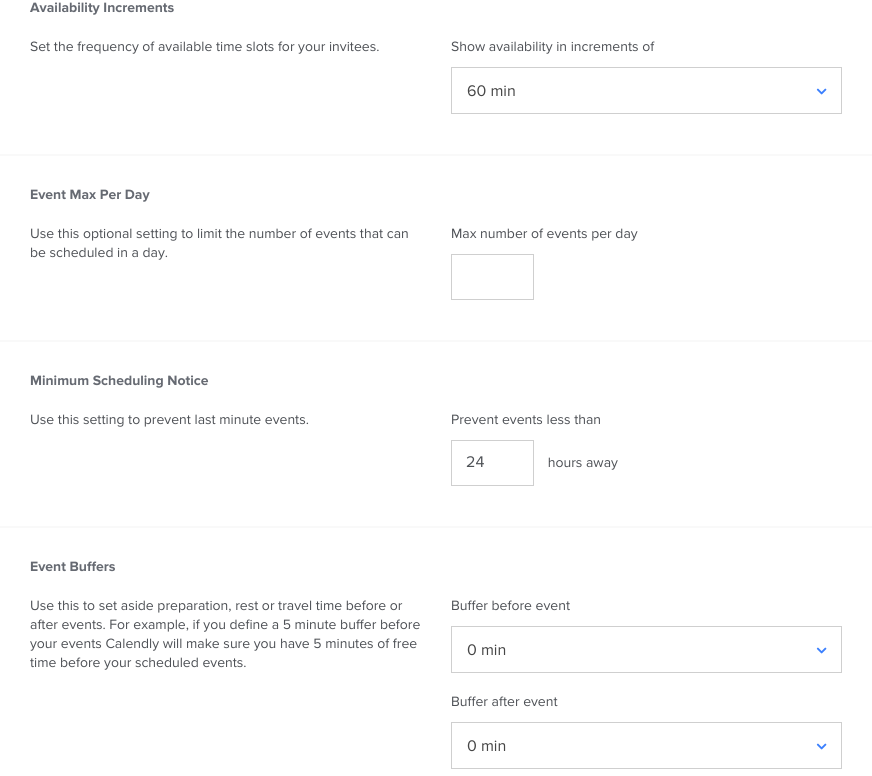
9. Now click on the “Advanced” tab. Here we’re going to change the time-slot option to 60 minutes so that people are only allowed to schedule at the start of every hour. (30-minutes would allow somebody to schedule an hour-long appointment starting in the middle of an hour e.g. 10:30 am to 11:30 am.) I also don’t want any last minute appointments so I’m going to require scheduling at least 24-hours in advance.
Click “Save & Close”.
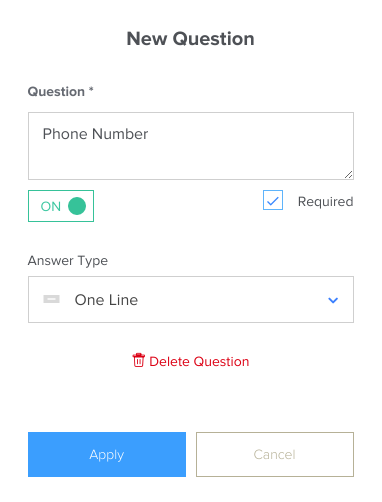
10. Because these are phone appointments I need to get the phone number my clients wants me to call them from. To do that I click on “Invitee Questions” followed by “Add a New Question”. I’m going to type in “Phone Number” and click on the checkbox next to “Required” while leaving it as a one-line response.
Click “Apply” followed by “Save & Close”.
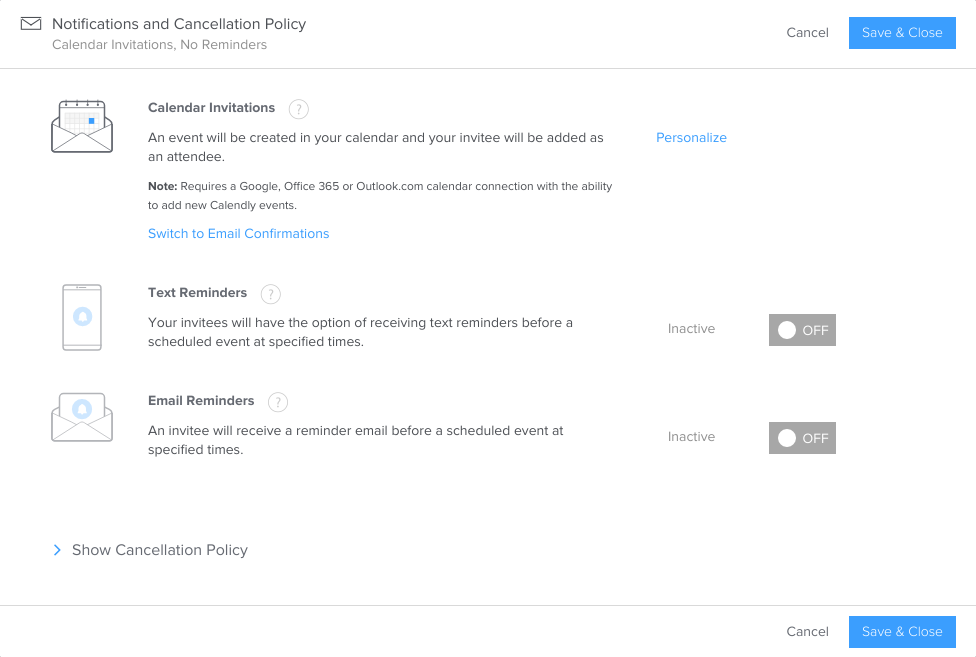
11. The last step to creating an event is to set up the reminder email that I want sent to the client the day before they are scheduled. Click on “Notifications and Cancellation Policy”. I’m going to start by turning on email confirmations by clicking on “Switch to Email Confirmations”. Then click on the toggle switch next to “Email Reminders”. You can personalize both the confirmation and the reminder emails if you want to add a personal message or if there is something that you client should do prior to the appointment or something they should bring to the appointment.
12. Now that you’re done you just need to click on the toggle switch to turn it on.
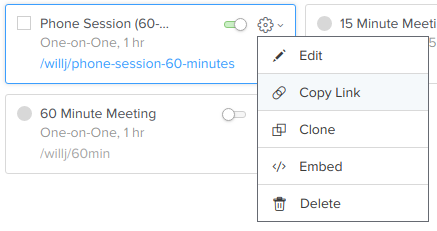
13. In order to get the URL that you’re going to send out to your coaching clients you click on “Event Types” in the menu at the top of the screen. Find your event and click on the gear icon. That will bring up a drop down menu where you click on “Copy Link”.
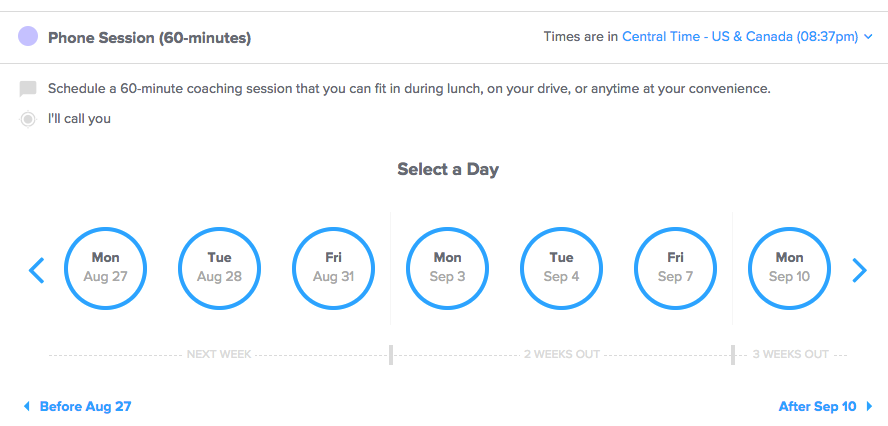
This is the dead simple screen that you clients will see when they click on the link you send them:
You are now ready to scale your coaching business to as many clients as you have time for! Well, at least the scheduling part of the equation. Poke around for more guides that will help you take your business to the next level!
